August 4, 2024
Attic Finishing and Remodeling in Seattle: A Comprehensive Guide
Finishing an attic can unlock valuable living space in your home, but in Seattle it comes with unique considerations. From strict building codes and permitting processes to climate-specific insulation needs, Seattle homeowners must plan carefully. This detailed guide covers everything you need to know – Seattle regulations, insulation requirements, heated flooring options, pros and cons, conversion ideas (bedrooms, bathrooms, ADUs), skylights, cost breakdowns, ROI, and tips for working with local contractors.
Seattle Regulations and Permitting for Attic Conversions
Seattle has specific building codes and permitting requirements for attic remodels. You will need a construction permit for most attic finishing projects in Seattle. In some cases, small projects may qualify for a Subject-to-Field-Inspection (STFI) permit (a faster process), but generally any structural changes, new plumbing/electrical, or changes to the building envelope require full permits and inspections. The Seattle Department of Construction & Inspections (SDCI) will review plans to ensure compliance with the Seattle Residential Code (SRC) and Seattle Energy Code.
Key Seattle building code requirements for attics include:
- Ceiling Height: Habitable attic rooms must have at least a 7′-0″ ceiling height over at least 50% of the floor area. Areas with ceiling height under 5′ don’t count toward floor area ([Seattle SDCI Tip # 303A - Common Seattle Residential Code Requirements]. In practice, this means many attics need dormers or modified roof framing to meet the height rule. For example, exposing collar ties or adding a dormer can help achieve the 7′ height requirement.
- Floor Area and Room Size: Any finished attic room (e.g. a bedroom) must be at least 70 sq. ft. in area to qualify as habitable space ([Seattle SDCI Tip # 303A - Common Seattle Residential Code Requirements]). Additionally, it should be at least 7 feet wide in any direction. Portions of the room with less than 5′ height are not counted.
- Structural Support: Most older Seattle attics were not built to support living space. The floor joists and rafters often are 2x4s or 2x6s intended only for light storage. Converting an attic typically requires structural upgrades, such as installing deeper floor joists (e.g. 2x10) and beefier rafters (e.g. 2x12) to handle live loads and insulation. This can significantly change the attic’s usable space and must be accounted for in the design. A licensed structural engineer should evaluate the attic’s capacity and specify any reinforcements. It’s common to sister or replace joists, add beams, or even reinforce supports all the way down to the foundation for the new loads.
- Stairway Access: A code-compliant permanent staircase is required for a finished attic. Pull-down ladders or old steep stairs won’t suffice. The stair must meet modern standards: at least 36″ wide, max 7¾″ rise and minimum 10″ tread run, and minimum 6′-8″ headroom clearance ([Seattle SDCI - Building Energy Code Subject-to-Field-Inspection Checklist]). Often, fitting a stair is one of the biggest challenges – it may consume space on the level below and sometimes requires modifying the floor plan or adding a dormer for headroom at the top. If an existing stair is narrow or steep, it will likely need to be rebuilt to meet these requirements.
- Egress and Emergency Escape: For any new bedroom in the attic, Seattle code requires an emergency egress window or skylight. This opening must have a minimum net clear area of 5.7 sq. ft., minimum 20″ width and 24″ height, with the window sill no higher than 44″ off the floor ([Seattle SDCI - Building Energy Code Subject-to-Field-Inspection Checklist]. Typically, a dormer window or a large skylight can fulfill this. If the attic has gable walls, adding or enlarging a window there is common to meet egress. In addition, smoke alarms and carbon monoxide alarms must be installed in the new space (and interconnected with the house) per code ([Seattle SDCI - Building Energy Code Subject-to-Field-Inspection Checklist])).
- Electrical and Mechanical: The attic must meet current electrical code – meaning new wiring should be installed by a licensed electrician, with sufficient outlets (e.g. an outlet at least every 12 feet along walls), GFCI/AFCI protection as required, and hardwired smoke/CO detectors. If converting to living space, the attic will also need adequate heating. Seattle code requires that habitable rooms be served by the heating system; this could involve extending ductwork, adding electric heaters, or installing a separate HVAC unit. We discuss heating options (including heated floors) later in this guide. Additionally, any new bathroom will need an exhaust fan ducted to the outside (Seattle requires bathroom fans at ≥50 CFM vented outdoors).
- Whole-House Ventilation: Significant renovations in Seattle (additions over 500 sq. ft. or adding new habitable space) may trigger a requirement for a whole-house ventilation system per Seattle Mechanical Code. This often means installing an exhaust fan with fresh air intakes or a heat recovery ventilator (HRV) to ensure indoor air quality. An experienced contractor can determine if your project needs this.
- Zoning and Use: If the attic conversion will qualify as an Accessory Dwelling Unit (ADU) (i.e. a separate apartment), additional rules apply (discussed in a later section). Otherwise, the use remains part of the single-family home. Seattle’s zoning code also limits building height and lot coverage, but since an attic uses existing volume, it usually doesn’t affect those limits (unless you add a large dormer or bump-up that might count as adding height – always confirm with SDCI if in doubt).
Seattle’s permitting process for an attic remodel will involve submitting plans (architectural drawings and possibly engineering calculations) to SDCI. The city will review structural plans, fire safety (egress), energy code compliance, etc. Expect to budget a few months for permit review unless qualifying for STFI. Permit fees in Seattle depend on project size; for an attic remodel, permits might cost on the order of $1,000–$2,000 in fees (roughly 1–2% of construction cost). Working with a design professional familiar with Seattle codes can smooth this process. While hiring an architect is not explicitly required by law for single-family remodels, it’s often wise to do so for complex attic conversions. At minimum, structural engineering input is highly recommended given Seattle’s seismic zone – you want to ensure the modified attic and the rest of the house will be safe during earthquakes.
Insulation and Energy Code Requirements in Seattle Attics
Seattle’s climate (cool, wet winters and mild summers) and energy codes make insulation a critical aspect of any attic finishing project. The 2021 Seattle Energy Code sets high standards for insulating the “building thermal envelope,” which includes your attic’s walls and roof. When you convert an attic to living space, you’ll need to bring the insulation up to current code levels in most cases.
Required R-Values: As of the latest code, Seattle requires roughly R-49 to R-60 insulation in attic/roof assemblies. Specifically, the prescriptive code calls for R-60 in ceilings, but it allows R-49 if the full height of the insulation extends over the exterior top plates (e.g. using raised-heel trusses or equivalent). In practice, many Seattle attic conversions aim for R-49 minimum in the sloped roof areas. This is a high R-value, and achieving it in a typical old attic can be challenging. For walls (such as attic knee-walls or new dormer walls), the code requires about R-21 in the cavity plus R-5 continuous insulation (or an equivalent combination) ([Seattle SDCI - Building Energy Code Subject-to-Field-Inspection Checklist]) – for example, a 2×6 wall with R-21 fiberglass batts plus a layer of foam board. If parts of the attic’s existing framing remain intact and are not exposed, the code may not require opening them up fully; but any cavities that are opened must be insulated to these standards ([Seattle SDCI - Building Energy Code Subject-to-Field-Inspection Checklist]).
Insulation Types: Homeowners have several options to insulate a finished attic, each with pros and cons:
- Fiberglass or Mineral Wool Batts: These are common and cost-effective. High-density fiberglass batts can achieve R-21 in 5½″ cavities (for walls) and R-30 in 7¼″ cavities, but to reach R-49 in a roof you’d need about 15″ of fiberglass (which is usually impractical without a deeper rafter or adding furring). Batts require careful installation to avoid gaps and need baffle vents to maintain an air channel if the roof is vented.
- Blown-in Cellulose or Fiberglass: Blown insulation is great for flat attic floors, but in a finished attic you’ll be insulating the slopes and kneewalls, which usually necessitates something like dense-pack cellulose blown into closed cavities or netted in place. It can fill gaps better than batts. However, you still need enough depth to reach R-49. Sometimes an attic conversion will use a combination – e.g. dense-pack cellulose in rafter bays along with a layer of rigid foam on the interior.
- Spray Foam Insulation: Spray polyurethane foam (SPF) is popular in attic remodels because it provides high R-value per inch and doubles as an air seal. Closed-cell spray foam has about R-6 to R-7 per inch, so ~8 inches can get R-49. This can be sprayed directly under the roof sheathing, and it doesn’t require ventilation space (the code allows unvented roof assemblies if using air-impermeable insulation like closed-cell foam) ([Seattle SDCI Tip # 303A - Common Seattle Residential Code Requirements]). The result is a “hot roof” design. Closed-cell foam also adds structural rigidity and acts as a moisture barrier, but it’s expensive and must be applied carefully (professional installation needed). Open-cell foam (about R-3.7 per inch) can be used as well; it air-seals but is less R per inch and not a vapor barrier, so typically a thicker application or hybrid approach is needed. Many high-end Seattle attic projects use spray foam to maximize insulation in cramped rafter spaces.
- Rigid Foam Board: Another strategy is adding rigid foam panels (EPS, XPS, or polyiso) either above the roof deck (during a re-roofing/dormer project) or on the interior before drywall. For example, if you’re replacing the roofing, you could add 2–4 inches of polyisocyanurate foam on top of the roof sheathing to boost overall R-value, then insulate between rafters below. Interior foam (like 2″ boards under the rafters) can also provide R-10 and eliminate thermal bridging through wood. These approaches often are used in combination with batts or spray foam to meet Seattle’s tough energy code.
Ventilation vs. Unvented Roof: Traditional attics are vented (soffit and ridge vents) to remove moisture. In a finished attic, you can either maintain ventilation or create an unvented assembly. If using fiberglass/cellulose, you’ll need to keep a vent channel of at least 1″ between the insulation and roof sheathing, plus continuous ridge and soffit vents, per code ([Seattle SDCI Tip # 303A - Common Seattle Residential Code Requirements]). This can limit the insulation thickness unless rafters are deepened. The alternative is an unvented roof assembly, which Seattle allows if you use an air-impermeable insulation (e.g. closed-cell spray foam) against the roof deck ([Seattle SDCI Tip # 303A - Common Seattle Residential Code Requirements]). Unvented design can simplify framing (no vent baffles needed) and often is the only way to insulate tight cathedral ceilings to R-49. However, you must ensure a good vapor barrier and no leaks, since moisture can’t easily escape. Many Seattle homes opt for a hybrid: a couple inches of closed-cell foam for air seal, then batts beneath to reach the full R-value – this can sometimes allow a partly unvented approach with vapor retarder paints, etc. It’s important to follow Seattle’s energy code and manufacturer guidelines to avoid condensation issues in our climate.
Air Sealing: Along with insulation, Seattle’s code emphasizes air leakage control. When finishing an attic, all those little gaps (around chimneys, plumbing vents, top plates, etc.) should be sealed. This is critical for energy efficiency and preventing warm moist air from reaching cold surfaces (which could cause mold). Expect your contractor to install foam or caulk at penetrations and possibly do a blower-door test at project completion if required by code or for energy rebates.
Vapor Retarders: In Seattle’s marine climate (zone 4C), a Class I vapor barrier (like poly sheeting) is often not required on interior walls; in fact, trapping moisture can be a concern. Instead, a vapor-retarder paint or smart membrane might be used on the interior side of insulation to slow moisture. If you do an unvented roof with spray foam, closed-cell acts as a vapor barrier on its own. It’s best to follow the energy code guidance (Section R402) and product specs to decide if additional vapor control is needed.
Insulating Floors and Sound: If your attic floor was previously the ceiling of the level below and already insulated (for thermal reasons), that insulation may be removed or re-purposed once the attic becomes heated space. However, you might choose to insulate the floor for sound – e.g. putting batts between joists to dampen noise between the attic and the rooms below. This is optional (and doesn’t need to meet R-30 floor insulation requirement since both sides are conditioned), but can make the space more comfortable and private. Additionally, resilient channels or sound-rated drywall can be installed if the attic will be a bedroom or ADU to reduce sound transmission.
In summary, plan for a well-insulated attic that meets Seattle’s high R-value requirements. The investment in proper insulation and air sealing will pay off in comfort and energy savings, and it’s essential for passing code inspections. Always discuss insulation options with a contractor who has experience with local code – they can recommend the best solution (spray foam, blown-in, etc.) for your particular attic geometry and budget.
Heated Flooring in an Attic Remodel – Pros and Cons
When considering how to heat your new attic space, one intriguing option is radiant heated flooring. This usually means either electric resistance mats/cables or hydronic (hot water) tubing installed under the floor. In Seattle, where winters are chilly but not frigid, heated floors can add comfort – especially in a bathroom or if the attic floors tend to be cool. Here are some pros and cons of heated flooring in an attic:
Pros of Heated Floors:
- Comfort: Heated floors provide a gentle, even heat. Stepping onto a warm floor on a cold Seattle morning is a nice perk, especially if your attic includes a bathroom with tile flooring. It can make the space feel cozier and eliminate the “cold feet” problem.
- Space Efficiency: Radiant floor heat is invisible – no radiators, baseboards, or ducts taking up space. This is valuable in an attic where wall space and headroom are limited. It also makes furniture placement easier when you don’t have to account for heating registers or units.
- Zoned Heating: A floor heating system in the attic can be separately controlled. If the attic is used only occasionally or kept at a different comfort level, you can heat it on demand without overheating the rest of the house. This can be efficient.
- Quiet and Clean: Unlike some forced-air systems, radiant floors are silent and don’t blow dust around. This can be a benefit for allergen-sensitive occupants.
Cons of Heated Floors:
- Installation Cost and Complexity: Heated floor systems can be expensive to install. Electric radiant mats are easier for small areas (like a 5′x8′ bathroom might cost a couple thousand installed), but for larger rooms the operating cost can be high. Hydronic systems (PEX tubing in floor) require a boiler or water heater hookup and significant labor – often not cost-effective unless part of a whole-house radiant system.
- Floor Height and Weight: Adding radiant heating (especially hydronic) can build up the floor thickness. For example, hydronic tubes might be set in a thin lightweight concrete or self-leveling compound which adds weight and about 1.5″+ of height. In an attic, raising the floor could eat into your precious headroom and also add load to the structure. Electric mats are thinner, but you still need to embed them in mortar if under tile. Always ensure the floor structure can handle any added weight (water-filled tubes, mortar, etc.). This usually is fine if designed properly, but it’s a consideration.
- Energy Efficiency Considerations: If the attic floor was previously insulated and now you’ve removed that insulation (because the attic is heated space), a heated floor in the attic is essentially heating the attic air (which you want) and the ceiling of the floor below (which is already heated room, so that heat isn’t lost). This isn’t as wasteful as, say, heating an uninsulated slab, but it means some fraction of your heated floor output is going downstairs. To counteract this, installers might put an insulating underlayment or reflective foil beneath the heat cables to direct warmth upward. Even so, electric heat in Seattle (where electricity rates can be high) may increase your utility bill noticeably if heating a large attic purely by floor heat. Hydronic floors can be more economical if tied into a gas boiler, but Seattle is trending away from fossil gas in new installs.
- Primary vs. Supplemental Heat: In a small attic bathroom, an electric heated floor might provide all the heat needed. But in a larger attic room, you might still need a primary heat source (like a ductless mini-split or radiators). Radiant floors are often slow to respond and sized for comfort, not rapid temperature changes. Many homeowners use them as a supplement – for instance, running a warm floor in the morning, while the main HVAC (or a space heater) handles overall heating if needed.
Bottom Line: Heated flooring in an attic is a luxury rather than a necessity, but it can be worth it for targeted areas or high-end projects. In Seattle, we commonly see electric radiant floor mats in attic bathrooms – it’s a relatively simple add-on during the remodel and greatly improves comfort underfoot. Installing a full-floor hydronic heating system in an attic bedroom is less common unless the home already has hydronic heating. Discuss with your contractor whether the added cost makes sense given your attic’s use. They will consider the floor build-up, electrical capacity (a dedicated circuit may be needed for electric heat mats), and integration with your overall heating plan. If you do opt for radiant floor heat, be sure it’s thermostat-controlled and well-insulated underneath to get the best performance.
Pros and Cons of Attic Remodels
Finishing an attic is a major project, so it’s important to weigh the overall benefits and drawbacks. Here’s a summary of the pros and cons of attic remodels:
Pros:
- Increased Living Space: An attic conversion can add one or more rooms without enlarging the house’s footprint. This is often the most cost-effective way to gain square footage in Seattle’s dense urban lots. You can create a new bedroom, office, or even a small apartment within existing unused space.
- Higher Home Value: Turning an empty attic into livable area can significantly boost your home’s value. It increases official square footage (if done with permits to code) and can add bedrooms/bathrooms which raise market value. Many Seattle homeowners see a strong return on investment (more on ROI below) – historically attic conversions recoup around 65%–75% of their cost at resale on average. It can be a savvy investment, especially compared to building an addition.
- Avoiding Moving or Building Out: Instead of moving to a larger home or adding an extension, finishing an attic allows you to adapt your current home to your needs. This is great for growing families or those needing an office or guest suite – you can stay in the neighborhood you love and add space vertically. No need to take up yard space as an addition would.
- Rental Income Potential: If configured as an ADU, an attic can generate rental income. Seattle’s ADU policies are friendly (no owner-occupancy requirement currently and no extra parking required), so an attic apartment could be rented to help offset your mortgage. Even a simple bedroom/bath conversion could be rented to a roommate. This can turn the attic into an income-producing asset.
- Appeal and Views: Attic rooms can be very charming, with dormer window alcoves, sloped ceilings, and skylights. If your home has a view of mountains, Lake Union, etc., capturing that view from a new attic dormer or window can be fantastic. A well-done attic remodel can become a cozy retreat with unique architectural character, potentially even giving you a master suite under the eaves that feels private from the rest of the house.
- Use of Wasted Space: Many Seattle attics are just collecting dust or cobwebs. Finishing the attic puts that space to productive use, whether as living area or organized storage. Even if you don’t make it a full living space, basic finishing for climate-controlled storage or a hobby room can be beneficial (though note, basic storage finish won’t count as living space or add value like a full conversion).
Cons:
- High Cost per Square Foot: Attic conversions are often expensive and complex. The irregular shapes, structural work, and retrofit nature can drive costs into the range of $150–$300 per sq ft in Seattle for a full dormer + bathroom project. As an architect quipped, sometimes it’s “faster and cheaper just to rip your whole roof off and build something from scratch”. While that’s an extreme take, it highlights that an attic remodel can cost nearly as much as an addition but with more design compromises.
- Structural Limitations: As noted, many attics need major structural upgrades – new joists, rafters, posts, beams, possibly foundation reinforcements. This is invasive work that can impact the whole house (opening walls below to add beams/columns, etc.). Not every house can easily accommodate this. The added weight of new rooms was not in the original plan of the house, so one has to be sure the structure can handle it. These modifications add cost and might even be infeasible in some cases. For example, if your attic is built with W-shaped trusses, there is very little open space and reframing the roof is a massive undertaking.
- Reduced Space due to Code: The necessity to meet modern code can actually reduce the usable space in the attic. Deeper insulation and bigger joists/rafters eat into headroom. You might lose several inches (or more) of height when you insulate the roof and finish the ceiling. If you have to build up the floor structure, you raise the floor level, further cutting into headroom and making existing stairs too short. All this can turn a marginal attic into a non-viable one, or at least shrink the perceived space.
- Challenges with Stairs and Layout: Adding a staircase can steal space from other parts of the house (typically the floor below). You might have to sacrifice a closet or reconfigure a room below to create a stairwell. Also, the new stair opening can be tricky to place for head clearance. If a suitable spot doesn’t exist, a dormer might be needed to get headroom at the top of the stairs – an extra project in itself. Overall, fitting a functional layout (with hallway, doors, full-height areas for furniture, etc.) within the attic’s confines is like solving a puzzle – it may involve trade-offs like low knee-wall storage areas instead of full-height walls, etc.
- Potential for Overcapitalization: If the attic is very small or awkward, the cost to finish it might not translate to equivalent added value. For instance, spending $150k to add a 200 sq ft micro-bedroom might not be a great investment if it doesn’t significantly increase the home’s appraised value or appeal. It’s important to evaluate if the attic project makes financial sense relative to other options (like finishing a basement, which might be cheaper per sq ft in some cases).
- Construction Disturbance: Remodeling an attic can be disruptive. Workers will need access through your home, there will be noise, dust, and possibly times when ceilings are opened up for structure work. It can easily take 6-10+ weeks to finish an attic. During construction, parts of your home may not be usable. Unlike an addition which is outside until an opening is made, attic work happens within the existing shell.
- Climate Control Issues: Attics can be prone to being too hot in summer or cold in winter if not designed carefully. Heat rises, so keeping an attic cool in summer may require adding cooling (Seattle’s summers have gotten warmer, making AC more desired). Conversely, in winter any air leaks or thin insulation will make the attic chilly. While these can be mitigated (with good insulation, mini-split AC, etc.), it’s an extra consideration. Even with everything done right, the top floor often experiences more temperature fluctuation.
- Perception and Buyer Concerns: Some homebuyers are wary of attic conversions if they think they were DIY or not permitted. There can be a stigma if not done to a high standard – e.g. “Will that attic get too hot?” or “Those skylights might leak.” Ensuring a professional job with permits helps avoid this, but it’s worth noting that a poorly executed attic remodel could even detract from value (for example, if it created an odd layout or violated code).
Overall, an attic remodel in Seattle can be immensely rewarding, turning underutilized space into something functional and boosting your home’s value. The pros often outweigh the cons if the attic is sizable and structurally fit for conversion. However, careful planning is needed to address the challenges and control costs. Next, we’ll explore specific ways to utilize a finished attic – from extra bedrooms to fully independent living units.
Converting an Attic into a Bedroom, Bathroom, or ADU
How you design your attic remodel depends on its intended use. Let’s break down considerations for the most common attic conversion scenarios: adding a bedroom (or master suite), adding a bathroom, and creating an Accessory Dwelling Unit (ADU).
Attic Bedroom Conversion
One of the most popular uses for a finished attic is as an extra bedroom or a primary bedroom suite. In Seattle, adding a bedroom can significantly increase a home’s value, especially if it turns a 2-bedroom house into a 3-bedroom, for example. When converting an attic to a bedroom:
- Code Requirements (Recap): A bedroom must meet the 7′ ceiling height rule for half its area, have at least 70 sq ft of space (with at least 7′ in each direction), and have an emergency egress window or skylight ([Seattle SDCI Tip # 303A - Common Seattle Residential Code Requirements]). It also needs heating. You’ll also need to plan for a closet if you want the real estate listing to count it as a bedroom (though code doesn’t mandate closets, buyers expect them).
- Layout: Identify where a bed will go – you ideally want a spot with full headroom so someone can stand next to the bed. Often the bed is placed under the slope where the ceiling is lower (since you’re lying down there) and use the high center for circulation. Built-in storage is your friend; many attic bedrooms feature custom cabinets or drawers in the low knee-wall areas for clothes and storage instead of freestanding dressers. Dormers are very useful to add usable floor area and bring light/ventilation. Even a small shed dormer can make a big difference in functionality, perhaps creating a nook for a desk or reading area.
- Stair and Access: Plan how the bedroom occupant will access the attic. If it’s a master suite, you might have a door at the bottom or top of the stairs for privacy. If it’s a bedroom for a child/guest, ensure a door can be placed in a sensible location at the top of the stair landing. A common design is a small landing or hallway at the top of the stairs, off of which the bedroom and possibly a bathroom/closet are accessed.
- Daylight and Egress: Make sure to include adequate windows or skylights. Beyond the required egress, having natural light is key to making an attic bedroom pleasant. Skylights on the roof slopes can flood the space with light (just be mindful of summer heat gain – venting skylights or shades can help). A dormer with windows or a gable-end window can provide views. If using a skylight as egress, it must be a type that opens wide enough (some skylights are specifically designed to meet egress dimensions).
- Noise and Privacy: Consider sound insulation in the floor joists so that the bedroom is quieter relative to the rest of the house. Solid core doors and insulating around any new walls (if multiple rooms in attic) will improve privacy.
- Master Suite Potential: If space allows, many people like to create a primary suite in the attic – a bedroom plus an attached bathroom (and sometimes a walk-in closet). This can truly transform your home by adding a private retreat. We’ll cover bathroom specifics next, but keep in mind you need enough headroom to accommodate both rooms. Sometimes the entire attic becomes a large loft-like suite with the bed area open to a sitting area and a bath tucked behind, etc. Seattle builders often showcase attic suites with exposed beams and skylights, turning formerly dark attics into stunning living quarters.
Adding a Bathroom in the Attic
In many attic remodels, homeowners wish to include at least a small bathroom. A bathroom greatly enhances the functionality of the space – if the attic is a master suite or guest room, an ensuite bath is a huge plus. Even a half-bath (toilet and sink) can be helpful if the attic is used as an office or rec room, saving trips downstairs. Here are considerations for an attic bathroom:
- Plumbing Stacks: The easiest way to add an attic bathroom is to locate it above or near the existing bathrooms/kitchen below. Stacking the plumbing makes running drain lines (which rely on gravity) much simpler. For example, if you have a second-floor bathroom, putting the attic bathroom directly above it means you can tie into the vent and waste stacks with shorter runs. If you cannot align vertically, you’ll need longer waste pipes which must maintain slope and might have to run between floor joists and down a chase. A plumber will determine feasibility, but expect some ceiling/wall openings below to connect new pipes.
- Space and Layout: Attic bathrooms often have to be compact due to limited full-height area. A common solution is a dormer dedicated to the bathroom – this provides needed height for a shower and increases usable floor area. Even a small shed dormer can allow a normal shower stall or tub against an exterior wall (without a dormer, a shower might not fit if the slope is too low). If a dormer isn’t possible, consider a corner with a skylight above a tub (for headroom) or design the bath with a layout that puts the toilet or tub under the low part (since you sit to use those) and leave the center for standing space. Remember code requires at least 6′8″ height at the center of fixtures like toilets and vanities ([Seattle SDCI Tip # 303A - Common Seattle Residential Code Requirements]).
- Plumbing and Vents: You will need to run hot and cold water lines up to the attic (usually ½″ PEX tubing is used in modern remodels) and a 3″ or 4″ waste line for a toilet (smaller for sinks/showers). The new fixtures must be tied into the home’s drain-waste-vent (DWV) system. Often the existing vent stack (that goes through the roof) can be extended upward to serve the attic bath. If not, a new vent may need to be run through the roof. Additionally, Seattle Plumbing Code will require adequate venting of each fixture trap (either via vent piping or sometimes an Air Admittance Valve if allowed). This is technical, but your plumber will handle it – just note that walls or chases to conceal these pipes will be part of the project.
- Electrical and Lighting: Bathrooms require dedicated 20-amp circuits and GFCI protection. Plan for outlets near the vanity, overhead lighting, and perhaps lighting in a shower. With sloped ceilings, you might use skylights or high windows for natural light and ventilation, but an exhaust fan is mandatory. The fan should vent out the roof or gable wall – often it can go through the roof near a dormer or use a pre-existing roof vent location. Seattle’s energy code may require a higher-efficiency fan (for example, a minimum 50 CFM with certain sound ratings).
- Fixture Selection: In small attic baths, consider space-saving fixtures: a corner sink or a shower with a lower tub (or a shower-only instead of a full tub). There are tubs designed for dormers (shorter length or clawfoot tubs you can tuck under the slope since you step in them from an open side). Wall-hung toilets or sinks can save a few inches. Also ensure all fixtures can be carried up – tight stairs might make it tough to bring a one-piece tub, so sometimes you use sectional shower enclosures or build a tiled shower in place.
- Heating: Don’t forget to heat the bathroom. Options include extending a heating duct, adding a radiant floor mat (as discussed), or simply using an electric wall heater or towel-warmer radiator. Bathrooms under the roof can get chilly without heat. Also, insulate the heck out of any knee walls or sloped ceilings in the bathroom to keep it comfortable.
- Cost Impact: Bathrooms are one of the most expensive parts of a remodel (per square foot). Running plumbing lines, waterproofing, and tiling all add cost. In Seattle, adding a simple bathroom to an attic can easily add $20,000–$60,000 to the project, depending on size and finishes. It’s a significant investment, but usually worth it for the convenience and home value (a 3 bed/2 bath home is far more valuable than 3 bed/1 bath, for instance). If budget is a concern, one strategy is a half-bath (toilet and sink only) which is much simpler – no shower means no waterproof shower stall or high-volume drains to install.
Attic as an ADU (Accessory Dwelling Unit)
Seattle allows you to convert part of your single-family home into an Attached Accessory Dwelling Unit (AADU) – essentially a secondary self-contained apartment within the main house. An attic can serve as an ADU if it meets the requirements. Creating an attic ADU is more involved than a simple bedroom/bath, but it can add significant utility and value by providing a rentable unit or independent living space for family.
Key considerations for an attic ADU in Seattle:
- Size Limits: Seattle’s rules limit the size of an ADU. An attached ADU may be up to 1,000 sq. ft. or 40% of the floor area of the main house (whichever is smaller). Most attics will be within this size, but if you have a very large attic it cannot exceed those caps as an ADU. Only one attached ADU is allowed per property (but you could have one attached and one detached, under certain conditions, thanks to recent code changes).
- Separate Facilities: An ADU needs the full complement of a dwelling: kitchen, bathroom, and living/sleeping space. In an attic, this means you must carve out a kitchen area – which requires running a kitchen sink (with plumbing), countertop, cabinets, possibly a range or cooktop, and a refrigerator. You’ll need outlets for appliances and might need a 240V circuit for an electric range. Essentially, think of the ADU as a small apartment: everything the person needs to live independently must be provided.
- Egress and Entrance: Providing a separate entrance is crucial. How will the ADU occupant enter the attic without going through the main house’s living areas? Some options: converting an existing stair to have a door at its base that exits to a vestibule or exterior door; adding an exterior staircase up to the attic (tricky with height, and may not look great or meet setbacks without a bump-out); or using a shared entry foyer then separate locking doors. Seattle code for attached ADUs allows a shared internal entry in some cases, but typically you’d want a private exterior door for the ADU for rental use. Fire egress is also critical: beyond the egress window requirement for the bedroom, an ADU might be required to have two means of egress (check with SDCI – often the primary entrance plus one egress window suffice for a small ADU).
- Fire Separation: When a single-family home is split into two dwelling units, building code treats it like a duplex. This usually means you need a fire-rated separation between units. Often the attic floor (the ceiling of the level below) might need to be upgraded to a 1-hour fire-resistance rating, and any shared walls or stair enclosure as well. In practice, this could mean adding a layer of Type X drywall on the ceiling below, using solid core self-closing doors, etc. Talk to your architect/contractor about the required fire separation assemblies (Seattle might refer to the IRC duplex separation rules or require an evaluation by the plans examiner). Also, interconnected smoke alarms between units or a central alarm system may be needed for safety.
- Sound Insulation: While not strictly code, for an ADU you’ll want to heavily sound-insulate the separation (nobody wants to hear each other’s every footstep or TV program). This can be done with insulation, resilient channels, sound-rated drywall, and attention to sealing gaps.
- Heating and Utilities: Decide whether the ADU will share systems or have separate ones. Many attached ADUs share the main house’s utilities (electric, water, heat) and just include a clause in the lease about utilities. If you want separate metering, that’s a larger endeavor (new electrical meter, possibly separate heating system or plumbing lines). At minimum, provide a comfortable heating setup for the ADU – a dedicated ductless mini-split heat pump is a popular choice, as it gives heating and cooling independent of the main house. It avoids having to extend the main HVAC and allows the ADU occupant their own thermostat. Electric baseboard or radiant heat is another simple option, though less efficient.
- Kitchen Design: The attic likely needs a compact kitchen. You might use a 24″ wide apartment stove instead of full size, maybe a under-counter refrigerator if space is super tight (though tenants appreciate full fridges). Use space-saving ideas like a microwave hood fan, shelving in place of some upper cabinets, or even a European-style washer/dryer combo tucked under a counter if you want in-unit laundry for a premium ADU.
- Permitting and Legality: Converting to an ADU means you are establishing a second dwelling unit. This will involve additional permit scrutiny – you may need to register the ADU with the city. Seattle no longer requires owner-occupancy on the property (as of recent rules) and does not require off-street parking for ADUs, which makes it easier. However, there may be impact fees or utility connection fees for the new unit (Seattle Public Utilities might charge for an additional unit on water/sewer, for example). Be sure to follow the SDCI process for establishing an ADU, which could include a stricter inspection at final to ensure all life-safety requirements are met.
- ROI for ADU: The cost to create an attic ADU is high (you’re essentially adding a mini apartment), but the return can be excellent if you plan to rent it. In Seattle’s rental market, a one-bedroom ADU could rent for $1,500–$2,000 per month (depending on location and amenities). That income stream can eventually offset the construction cost. From a resale perspective, a home with a legal ADU is often appraised higher, though not always dollar-for-dollar. The ability for a buyer to rent out the ADU can be very attractive. We’ll touch more on ROI in a later section, but many Seattle homeowners pursue ADUs as both an investment and a way to contribute to the housing supply.
Converting an attic to an ADU is complex and will involve professionals (architect, contractor) to design it properly. It effectively combines all the challenges of a bedroom and bathroom conversion, plus kitchen and code separation requirements. But if done right, you end up with a fully independent living space that can be used for extended family (like a nanny suite or grown child’s apartment) or as a rental unit.
Best Uses for a Finished Attic Space
Aside from the big three (bedroom, bathroom, ADU), there are other great ways to utilize a finished attic. Depending on your needs, you might consider:
- Home Office or Studio: In the work-from-home era, an attic can serve as a quiet home office isolated from the bustle of the main living areas. The attic’s seclusion is perfect for focus. Alternatively, it could be an artist’s studio, craft room, or music practice room. The abundant natural light from skylights makes for an inspiring workspace.
- Children’s Playroom or Teen Hangout: An attic can be a magical playroom for kids – a cozy space for toys, reading, and imagination. As kids grow, it can evolve into a homework area or a teen lounge for playing video games or watching movies with friends (keeping the noise somewhat contained).
- Home Theater or Media Room: The enclosed nature of an attic (with sloped ceilings) can create a den-like media room. You can add sound insulation and a big screen TV or projector for a mini home theater. Blackout shades on skylights would be a must for light control.
- Guest Suite: If you frequently host guests or family, an attic finished as a guest suite (bedroom + bath) works very well. It offers guests privacy and a cool experience (who doesn’t like a quaint attic room?). Seattle has a lot of out-of-town visitors (hello, relatives escaping the summer heat elsewhere), so having a nice guest retreat can be great.
- Hobby or Exercise Room: Perhaps you want a quiet yoga studio with a skylight looking at the sky, or a place to set up your model train layout, or a home library with built-in bookcases under the eaves. Attics can accommodate these niche uses. For a home gym, attics are sometimes limited by floor strength (heavy equipment) and ceiling height for things like treadmills or weight lifting overhead, but a basic exercise space or yoga mat area is doable if well-planned.
- Storage: Even after finishing, you can incorporate a lot of storage. E.g., build closets into the knee-walls, or leave one small section of the attic unfinished (with an access door) to store holiday decorations, suitcases, etc. This way you don’t lose all storage – you just make it more organized. Some attics have charming little cubbies that double as bench seats with storage inside.
Ultimately, the best use of your attic will depend on your household’s needs. Many people combine uses – e.g. an attic can be a multi-purpose flex space that serves as a guest room and an office (a sofa-bed and a desk could coexist), or a playroom that also has a small bathroom so it’s essentially an upstairs family room. The key is to prioritize what’s most needed, because even a large attic can feel smaller once you carve out stairs, headroom, bathroom, etc. Clever built-ins and furnishing will maximize its functionality.
An unfinished Seattle attic being converted into living space. Note the added subfloor, insulation, and framed skylight openings – these will create a bright, code-compliant room once completed.
Skylights in Attic Remodels: Design, Installation, and Value
Skylights are almost synonymous with attic remodels – they bring in much-needed natural light and ventilation to what could otherwise be a dark, stuffy space. In Seattle, skylights are particularly popular for capturing daylight during our gray winters and for venting out warm air during the summer. Let’s explore how to best design and install skylights in an attic, and what their impact is on value and ROI.
Design and Placement: When planning skylights, consider the attic’s layout and roof orientation. South- or west-facing skylights will bring in the most light but also more heat, whereas north-facing skylights provide softer light. In Seattle’s climate, a bit of solar gain from a south skylight can be pleasant in winter, but you’ll want shades or operable vents to avoid overheating on rare hot days. Align skylights thoughtfully – for example, centered over a stairwell or in line with windows below for a pleasing look. In a finished attic, you might use multiple smaller skylights instead of one giant one to distribute light more evenly. Also decide between fixed skylights (don’t open) vs. venting skylights (can be opened like a window, or are electric venting). Venting skylights act like roof windows, letting hot air out from the top of the house (since heat rises, this can help cool the home naturally when opened). Many skylights now come with rain sensors that auto-close if it starts to rain – a useful feature in Seattle’s climate! Another option is roof windows or dormer-style skylights that are large enough to serve as egress – some European-style roof windows (e.g., Velux Cabrio) even open into a mini balcony. These can count as the emergency egress for a bedroom if sized properly, killing two birds with one stone.
Installation Considerations: Cutting a hole in your roof for a skylight must be done carefully by professionals to avoid leaks. Seattle’s heavy rain makes proper flashing and sealing absolutely critical. Generally, a skylight will be installed with a specific flashing kit (metal pieces that integrate with the shingles). Curb-mounted skylights sit on a framed curb and are common for flat roof or low-slope, whereas deck-mounted are lower profile for pitched roofs. In an attic remodel, skylights are usually installed during construction before interior finishes – the roofer will handle the exterior weatherproofing, and the interior will be trimmed out later. Ensure the skylight well (the light shaft through the insulation) is insulated and air-sealed to avoid thermal leaks. Use skylights rated for our climate – typically double-pane, low-E glass with a U-factor of 0.50 or better to meet Seattle’s energy code ([Seattle SDCI - Building Energy Code Subject-to-Field-Inspection Checklist]) (the code max for skylights is U-0.50). High-performance skylights are available (some triple-glazed or with insulating frames) if you want to minimize heat loss. Also consider adding solar shades or blinds – many skylights have optional internal blinds, even solar-powered ones, to control light and heat. This is useful for bedrooms (to darken the room for sleep) or media rooms.
Skylights and ROI: Do skylights add value to your home? It depends. Skylights can be a desirable feature for many buyers – they make a room feel bigger and more modern, and people love natural light. However, some buyers worry about leaks or heat loss. According to industry discussions, skylights have a bit of a “gray area” ROI: they won’t by themselves recoup their cost like adding square footage does. They are more of an enhancement that can tip a buyer’s preference. The good news is, a correctly installed skylight will not detract from your home value (it won’t count against you in appraisal), and for the right buyer it’s a bonus selling point. In the context of an attic remodel, the cost of adding skylights (maybe $2,000–$4,000 each installed) is usually justified by the improved livability of the space. An attic bedroom with a skylight for stargazing or natural light is simply more appealing than one without. Skylights also can save energy if used smartly – e.g., letting sun in during winter for passive heating, or venting out hot air in summer instead of using AC. These subtle benefits might not show up as a line item ROI, but they improve the overall utility of the attic. If your attic has minimal opportunities for windows (say, no gable wall), skylights may be the only way to get light in, and thus are essential.
Maintenance and Durability: Modern skylights are built to last decades, with seals and flashing that prevent leaks. To maintain them, keep debris off the roof (to allow drainage) and consider ones with easy-to-clean coatings. Some skylights are now available with automated venting and shades you can control via smartphone – a high-end touch that some Seattle luxury renovations include. From a resale perspective, a new buyer might not pay extra for automated skylights, but they showcase the quality of the remodel.
In conclusion, include skylights if feasible – they truly transform attic spaces. Just plan for them early (for placement and framing). When done well, skylights add both emotional value (a wow factor and enjoyment of the space) and practical value (light, ventilation) to your attic remodel. In our cloudy Pacific Northwest, any chance to bring in more daylight is usually worth it!
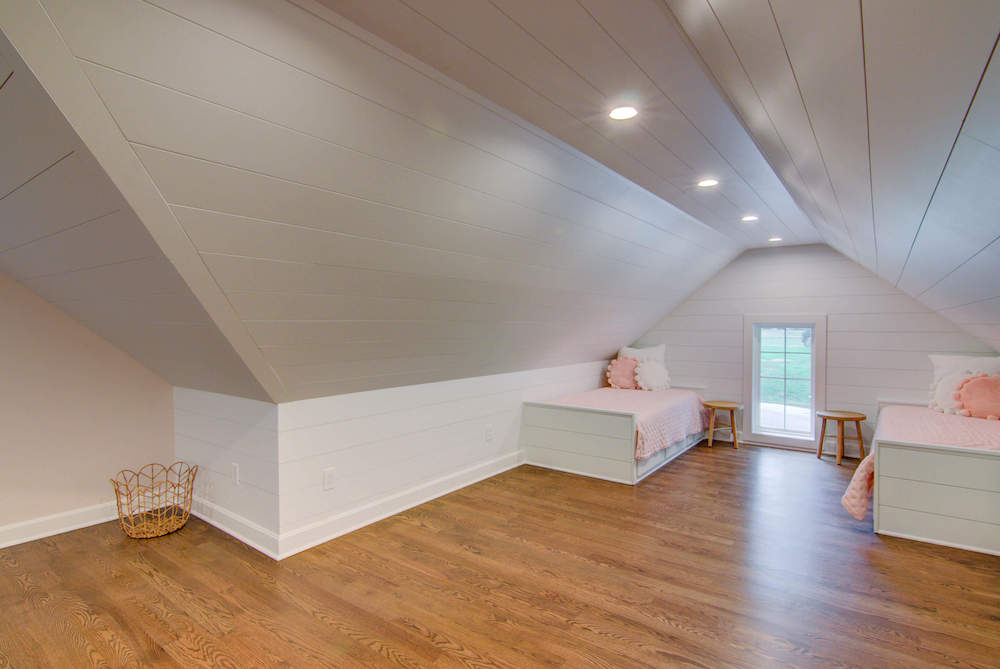
Finishing touches: an attic remodel with new drywall and a large skylight. Skylights brighten the space and can serve as emergency egress, but must be installed with proper flashing in Seattle’s rainy climate.
Cost Breakdown of Attic Remodeling in Seattle
The cost of an attic remodel in Seattle can vary widely depending on the scope (simple room vs. full suite with dormers) and the existing conditions. Seattle’s labor and material costs are generally higher than national averages, and you should also budget for sales tax on materials and contractor services. Below is an itemized breakdown of typical costs for a Seattle attic finishing project, assuming a comprehensive conversion to living space:
- Design & Engineering ($2,000 – $8,000): Includes architectural plans and structural engineer fees. Larger projects or ADUs will be on the higher end.
- Permits and Fees ($1,000 – $3,000): City of Seattle permit fees for remodel. ADUs may incur additional utility connection fees.
- Demolition & Prep ($1,000 – $5,000): Clearing out old insulation/debris, demo of obstructions.
- Structural Framing Modifications ($5,000 – $20,000+): Floor joist reinforcement, adding beams or posts, dormer construction.
- New Staircase (or Stair Mods) ($2,000 – $10,000): Installing or modifying a code-compliant staircase. Includes railing and finish.
- Insulation & Drywall ($6,000 – $15,000): Insulation to code and drywall finishing. Spray foam is on the upper end.
- Electrical & Lighting ($2,500 – $6,000): New wiring, outlets, light fixtures. Could increase with subpanel or many fixtures.
- Plumbing (if adding bathroom) ($5,000 – $15,000): Rough-in for water supply and drain lines. Higher if not stacked over existing plumbing.
- Bathroom Fixtures & Finishes ($8,000 – $25,000): Toilet, vanity, tub/shower, tile, waterproofing, accessories.
- HVAC Heating/Cooling ($2,000 – $7,000): Mini-split systems, duct extensions, or electric heat.
- Flooring (Finish Floor) ($3,000 – $8,000): Finish flooring and subfloor if needed. Costs vary by material.
- Carpentry & Misc. Finishes ($2,000 – $6,000): Trim carpentry, doors, painting, built-ins.
- Skylights (each) ($2,500 – $5,000): Per skylight, including unit, flashing, labor, interior finish.
- Contingency (10–15% of project cost): For surprises like rot, electrical upgrades, hidden damage, etc.
As you can see, the totals can range quite a bit. For a simple attic bedroom (no bath, no dormer) you might be looking at around $50,000 on the low end to perhaps $80,000 mid-range. For a larger project with a bathroom and dormer(s), it’s not uncommon to reach $100,000–$150,000 in Seattle. In fact, some high-end attic master suite conversions with multiple dormers, deluxe bathroom, custom finishes, etc., can exceed $200,000. An attic ADU (with kitchen and all) will similarly be toward the higher end due to the added kitchen and code requirements.
These costs may sound high, but remember that construction in Seattle is generally costly. A local remodeling firm estimates Seattle attic remodels typically range from $60,000 to $120,000+ for a fully finished space, which aligns with the breakdown above. Always get multiple detailed bids and make sure each contractor is accounting for the same scope (one might exclude HVAC or permits, for example). And ensure whoever you hire is knowledgeable about Seattle codes so you don’t get hit with change orders for code compliance issues.
To save costs, consider finishing in phases (perhaps leave the bathroom for later, or finish just part of the attic for now), or using more economical finish materials (e.g. carpet instead of hardwood, fiberglass shower instead of custom tile). However, don’t skimp on critical items like structural work, insulation, and windows/skylights – those are hard to change later and are key to a successful attic conversion.
Return on Investment (ROI) for Attic Conversions in Seattle
From an investment standpoint, attic remodels generally offer solid returns in Seattle’s housing market. While every project and market cycle is different, data and local trends can give us insight into the potential ROI:
- Cost vs. Value Report: Historically, attic conversions recoup around 70-75% of their cost at resale in the Pacific region. For example, a mid-range attic bedroom project nationally had an average 72.9% ROI in one survey. This means if you spend $100k on an attic, you might expect the home’s value to increase by about $70k. Of course, ROI can fluctuate – if the real estate market is hot, you might recoup more; in a slow market, less.
- Seattle Market Factors: Seattle’s high home prices and shortage of affordable housing can actually boost the value-add of creating more living space. Adding a bedroom and bathroom in particular can move a home into a new category (e.g., from a 2-bed/1-bath $800k home to a 3-bed/2-bath $950k home, hypothetically). If the attic conversion allows the house to appeal to a larger buyer pool (say, families who need 3 bedrooms), the market value can jump significantly – sometimes more than the cost of the remodel if done smartly. That said, Seattle buyers also expect work to be permitted and to a certain quality; a shoddy conversion won’t fetch top dollar.
- Rental Income and Long-Term ROI: If you use the attic as a rented room or ADU, you can generate income that effectively pays back the investment over time. For example, renting an attic ADU for ~$1,600/month is ~$19k/year in gross income. Even after expenses, that could pay off a $120k construction cost in 7-8 years – after that it’s profit, not to mention the property value increase. This kind of ROI is attractive to homeowner-investors who plan to hold the property. Additionally, having a legal ADU might qualify the property for multi-family financing or increase its appraised value based on income, which can be a separate way of realizing ROI.
- Impact on Saleability: Beyond numeric ROI, an attic remodel can make your home easier to sell. Extra space and especially an extra bathroom are near the top of many buyers’ wish lists. A finished attic that adds a cool factor (like a loft vibe or great views) can set your home apart from similar homes on the market. Homes that check the boxes (e.g., the needed number of bedrooms/baths for a certain buyer demographic) tend to sell faster, which in an indirect way is a positive ROI (less time on market, potentially higher offers).
- Overall Home ROI Averages: According to some local remodeling experts, Seattle homeowners generally recoup 60% to 70% of their remodeling costs at resale. Attic conversions often fall in this range or a bit above mid-60s, depending on the project. They aren’t the highest ROI project (low-cost improvements like front door replacements can hit 90%+ ROI), but they’re one of the better ROI major projects because they add square footage. They tend to fare better than, say, upscale kitchen remodels in percentage terms. And of course, ROI isn’t 100% because part of what you pay for is the enjoyment and use of the space in the years before selling – something you do get value from, just not measured in sale price.
Market Data Example: A report by the National Association of Realtors and Remodeling Magazine might list an “Attic Bedroom Addition” with a job cost of say $80,000 and a resale value addition of about $60,000 (hypothetically), yielding ~75% cost recouped. In Seattle’s 2023 Cost vs Value data, while attic-specific projects weren’t individually listed, analogous projects (like adding living space) show strong recoup rates in the 60-80% range. Keep in mind these figures are averages – the exact ROI for your project will depend on how constrained your neighborhood’s housing is, the quality of the work, and how soon you sell after completing the project (remodel values depreciate over time as styles change and wear and tear occurs).
One note: if your attic remodel fixes a functional obsolescence (like the only access was via ladder and now you have proper stairs and a legal room), you might get an outsized return because you’ve fundamentally changed what the house offers. Conversely, if an attic was already finished in some fashion and you just lavishly update it, the ROI might be more limited to the quality upgrade rather than new space.
In summary, while you may not get every dollar back, an attic remodel in Seattle is generally a wise investment, especially if you plan to enjoy the space. You’ll increase your home’s value, usability, and potentially create income streams. Even at a 70% immediate ROI, you effectively got 30% of the project value “for free” in personal enjoyment or rental income. And if you stay in the home long term, the non-monetary benefits – having that needed room or suite – often outweigh the concern about exact resale value. With Seattle’s upward real estate trajectory in the long run, adding square footage tends to pay off.
Working with a Seattle Remodeling Contractor
Given the complexity of attic conversions (structural work, precise code requirements, multiple trades), it’s crucial to work with an experienced, licensed contractor familiar with Seattle projects. A good contractor will help navigate permitting, ensure work is to code, and deliver a safe, high-quality result. When vetting contractors, look for those who have done attic or second-story additions in Seattle before and can provide references.
One reputable local firm is RENOVA Contractors LLC, a Seattle-based licensed remodeling contractor (WA License # RENOVC*760NA). RENOVA specializes in home remodels and additions, and they prioritize doing projects “with precision and up to code,” complying with all local regulations (Renova Contractors LLC: Kitchens, Bathrooms, Basements remodels) (Renova Contractors LLC: Kitchens, Bathrooms, Basements remodels). Contractors like RENOVA can manage the entire attic remodel process: from design coordination, engineering, pulling permits, to the build itself. They understand the Seattle Residential Code nuances and will schedule necessary inspections at the correct stages (framing, insulation, electrical, etc.). Moreover, a contractor who regularly works in Seattle will know common challenges like working in older homes (balloon framing, knob-and-tube wiring removal, etc.) and the best practices for insulating and ventilating in our climate.
Tips for Homeowners:
- Planning and Quotes: Get detailed quotes from a few contractors. Be clear that the project is in an attic and ask how they will handle things like debris removal (often through a window via chute), protecting your home during construction, and working in tight conditions. The cheapest bid may not be the best if it omits key elements. Seattle remodel costs are high, so be wary of any bid that seems too good to be true.
- Timeline: Discuss the timeline with your contractor. Attic projects can take longer than they appear because of inspections and the sequential nature of work (can’t drywall until electrical/plumbing are roughed in and inspected, etc.). A typical timeline might be 6-12 weeks for a straightforward finish, and longer (3-4+ months) if you are adding dormers and a bathroom. Also consider seasonal impacts – roofing or dormer work is best done in the drier months (roughly June–September) to avoid water exposure.
- Living Arrangements: Figure out if you can live in the home during the remodel. Many people do stay since work is mostly confined to the attic, but there will be times when it affects your lower floors (like when cutting the stair opening, running new wiring, or tying into plumbing). A contractor can often coordinate to keep utilities disruptions short (e.g. one day without power for an electrical panel upgrade).
- Quality and Inspections: Insist on proper permits and final sign-off – it protects you. Unpermitted attic conversions can be a liability and complicate future sales. With permits, you know a city inspector is checking life-safety items. Also consider having a home energy audit or blower door test after completion to ensure insulation and air sealing were done well (some contractors include this, especially if pursuing energy efficiency rebates).
- Warranty: Most contractors will warranty their work for at least 1 year. Some, like RENOVA, offer extended warranties on workmanship (Renova Contractors LLC: Kitchens, Bathrooms, Basements remodels). This is important for peace of mind – if a minor leak appears at a skylight or a door sticks due to settling, you want to know your contractor will come address it.
By engaging a skilled Seattle contractor, you not only get expertise but also help with the heavy lifting of coordination. They will work with structural engineers for calculations, handle permit submittals (and any corrections the city requests), schedule licensed plumbers/electricians as needed, and keep the project on track. The result should be an attic that looks like it was always meant to be part of the house – solid floors, smooth walls, comfortable climate – rather than a makeshift afterthought.
Finishing an attic in Seattle is certainly a challenging project, but with the right planning and professional help, it can dramatically enhance your home. You’ll gain valuable square footage and possibly a breathtaking new space, all while adhering to Seattle’s building standards. Whether you dream of a master suite under the rafters, a quiet office loft, or a revenue-generating apartment, your Seattle attic might just be the untapped potential waiting to be realized. With attention to code requirements, thoughtful design, and a trustworthy contractor (like RENOVA or others), an attic remodel can be a rewarding investment that elevates both your lifestyle and your property value in the Emerald City.
Sources:
- Seattle Department of Construction & Inspections – Common Residential Code Requirements (attic height, egress, etc.) ([Seattle SDCI Tip # 303A - Common Seattle Residential Code Requirements)
- 2021 Seattle Energy Code – Insulation and Ventilation Standards ([Seattle SDCI - Building Energy Code Subject-to-Field-Inspection Checklist])
- Renova Contractors LLC – Seattle Home Remodeling Services (local code compliance)